Water Pie, a humble and surprisingly delightful dessert, has stood the test of time as a symbol of resourcefulness in the kitchen. Known for its minimal ingredients and straightforward preparation, this dessert is a testament to creativity during tough economic times. Its simplicity makes it an appealing choice for novice bakers or those looking to whip up something sweet without a trip to the grocery store.
In this guide, you’ll uncover the secrets of Water Pie: its origins, the ingredients that make it so special, and step-by-step instructions to recreate this nostalgic dessert in your own kitchen.
Table of Contents
What is Water Pie?
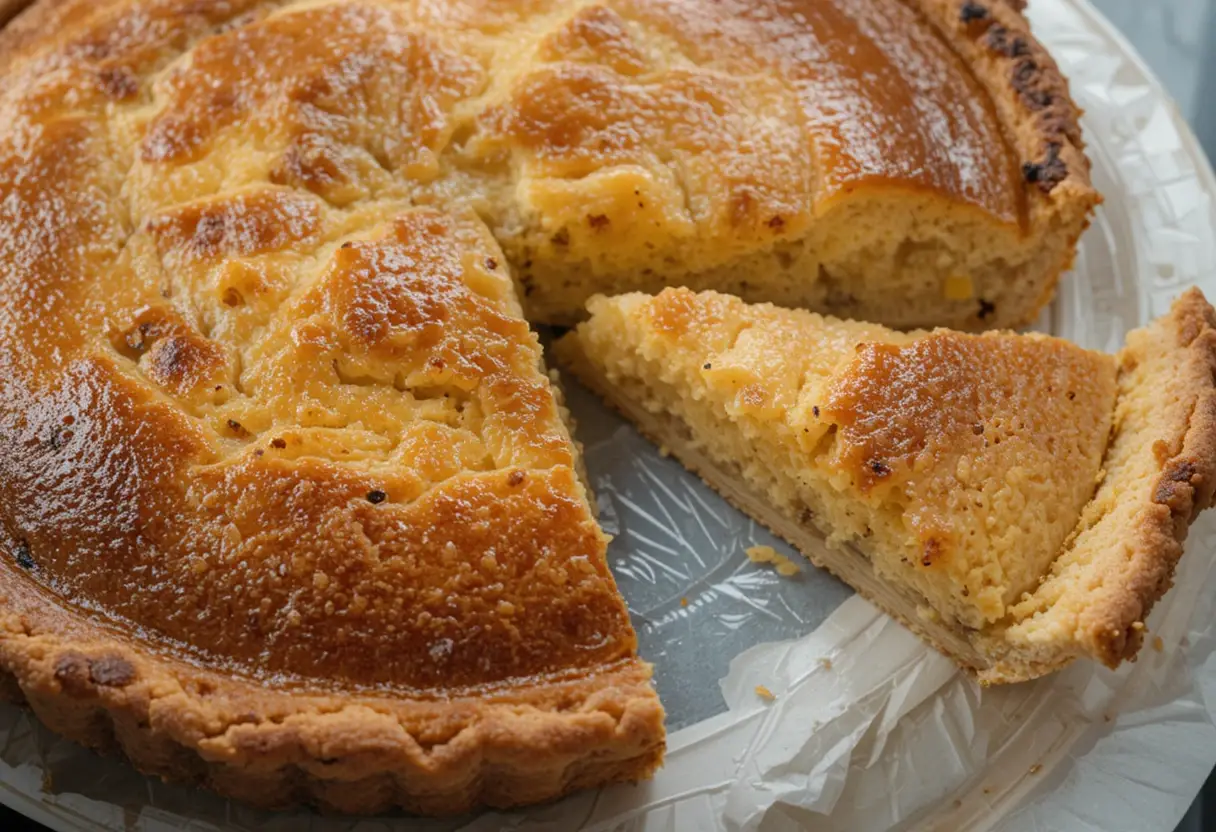
Water Pie is a classic dessert born out of necessity, often referred to as a “Depression-Era Pie.” Its key ingredient, as the name suggests, is water, complemented by a few pantry staples such as sugar, flour, and butter. Despite its unassuming ingredients, this pie results in a creamy, custard-like filling that surprises with its richness and flavor.
This dessert encapsulates the art of making do with what you have, offering a sweet reminder that delicious food doesn’t need to be extravagant or expensive. If you enjoy simple yet satisfying baked goods, you might also like trying these Avocado Brownies or a comforting Oatmeal Cranberry Cookie recipe.
Historical Background of Water Pie
Water Pie emerged during the Great Depression, a time when many families faced severe financial constraints. With limited access to costly ingredients like milk, cream, or eggs, home cooks turned to inventive recipes that could satisfy their sweet tooth without breaking the bank.
This pie became popular among families who relied on simple ingredients to create comforting meals and desserts. It was particularly cherished in rural communities where self-sufficiency was a way of life. The recipe embodies the resilience and ingenuity of that era, proving how creativity in the kitchen can turn humble ingredients into something extraordinary.
Today, Water Pie has experienced a resurgence, celebrated not only for its historical significance but also for its unique flavor and ease of preparation. If you’re interested in more old-fashioned comfort foods, you might enjoy this Old-Fashioned Vegetable Beef Soup or a hearty Meatloaf with Onion Soup Mix.
Essential Ingredients for Water Pie
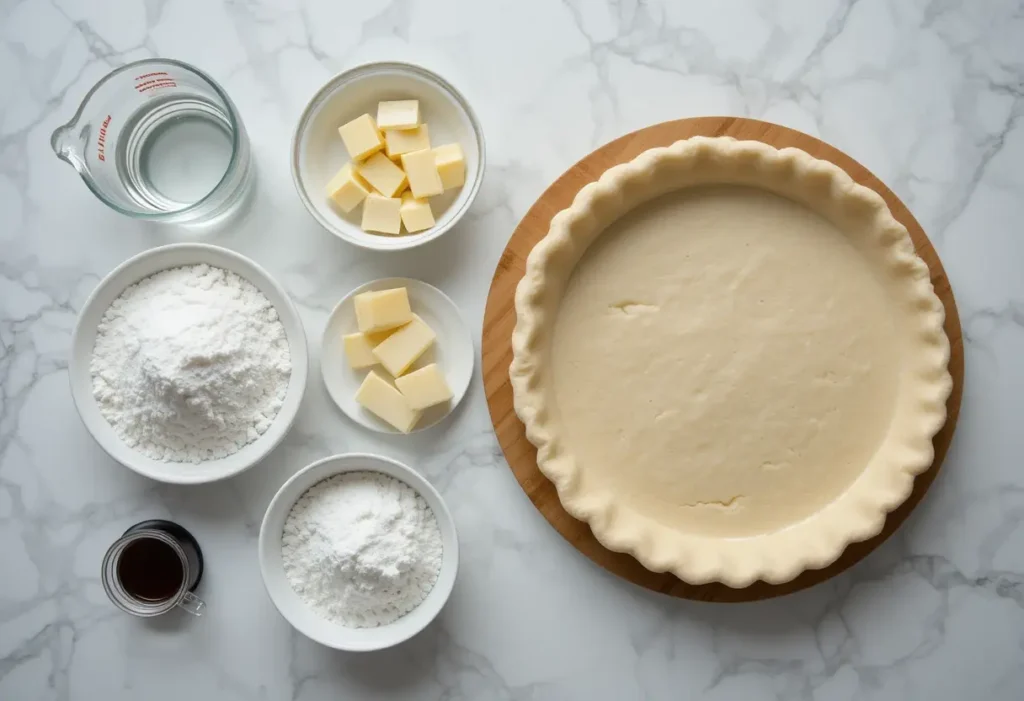
Water Pie uses a handful of affordable ingredients in precise amounts to create its distinct flavor and texture. Below is a breakdown of the essential ingredients by quantity, along with guidance on substitutions and variations for personalization.
Overview of Ingredients
- Water: 1 ½ cups
- The primary liquid base, giving the pie its custard-like filling.
- Sugar: 1 cup
- Adds sweetness and balances the flavors.
- All-Purpose Flour: 3 tablespoons
- Thickens the filling and creates the smooth, creamy texture.
- Butter: 5 tablespoons
- Cut into small pieces and scattered over the filling, adding richness and depth.
- Pie Crust: 1 pre-made or homemade crust
- Forms the flaky foundation of the dessert, holding the filling together.
- Vanilla Extract (Optional): 1 teaspoon
- Elevates the overall flavor profile with warm, aromatic notes.
Substitutions and Variations
Substitutions
- Butter Alternatives:
Replace butter with plant-based butter or margarine for a dairy-free version. - Sugar Replacements:
Swap granulated sugar with coconut sugar, maple syrup, or a sugar substitute for dietary needs or a different flavor. - Gluten-Free Options:
Use a gluten-free flour blend or cornstarch instead of all-purpose flour. Choose a gluten-free pie crust.
Variations
- Spiced Water Pie:
Add ½ teaspoon of cinnamon or nutmeg to the filling for a warm, spiced flavor. - Citrus-Infused Pie:
Mix in 1 teaspoon of lemon or orange zest for a refreshing tang. - Chocolate Water Pie:
Incorporate 1–2 tablespoons of cocoa powder into the flour mixture for a chocolaty twist. - Fruit Layered Pie:
Line the pie crust with thin slices of apples, pears, or peaches before adding the filling. - Nutty Topping:
Sprinkle ¼ cup of chopped pecans, walnuts, or almonds over the filling before baking for added crunch. - Creamier Texture:
Replace ½ cup of water with heavy cream or coconut cream for a richer, silkier filling.
By measuring the ingredients accurately and experimenting with these substitutions and variations, you can customize Water Pie to suit your taste while maintaining its nostalgic charm.
Step-by-Step Water Pie Recipe
Water Pie is an easy-to-make dessert that relies on a few simple techniques to achieve its signature creamy texture and sweet flavor. Follow these step-by-step instructions to create a perfectly baked Water Pie.
Preparing the Pie Crust
- Choose Your Crust:
- Use a store-bought pie crust for convenience or prepare a homemade crust from scratch if you prefer.
- Roll Out the Dough:
- If making your own, roll the dough into a circle about 12 inches in diameter on a floured surface.
- Fit the Crust:
- Carefully place the rolled-out dough into a 9-inch pie dish, ensuring it fits snugly without tearing.
- Trim and Crimp Edges:
- Trim excess dough around the edges and crimp the edges with a fork or your fingers for a decorative touch.
- Pre-Chill the Crust (Optional):
- Place the crust in the refrigerator for about 15 minutes to help it maintain its shape during baking.
Mixing the Filling
- Combine Dry Ingredients:
- In a mixing bowl, whisk together 1 cup of sugar and 3 tablespoons of all-purpose flour until well blended.
- Prepare the Filling Base:
- Gradually pour 1 ½ cups of water into the sugar-flour mixture, stirring continuously to ensure there are no lumps.
- Add Optional Flavoring:
- Mix in 1 teaspoon of vanilla extract for added warmth and depth of flavor.
- Pour Into Pie Crust:
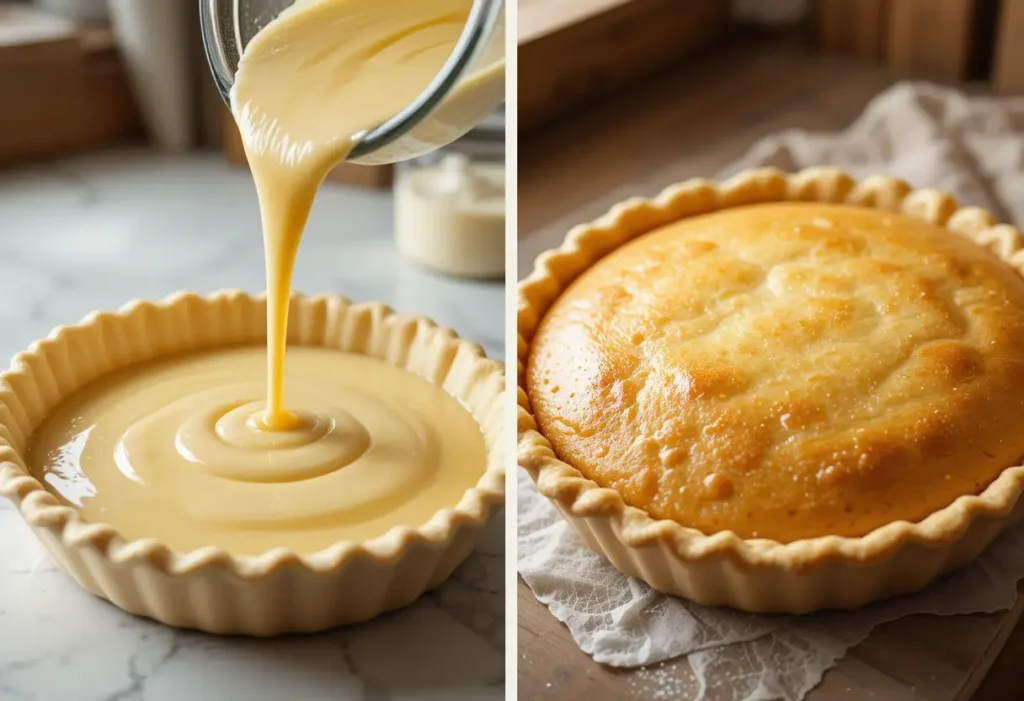
- Carefully pour the liquid mixture into the prepared pie crust. Ensure it is evenly distributed.
- Add Butter:
- Cut 5 tablespoons of butter into small pieces and scatter them evenly across the surface of the filling.
Baking Techniques
- Preheat the Oven:
- Set your oven to 400°F (200°C) and allow it to fully preheat.
- Prepare for Baking:
- Place the pie dish on a baking sheet to catch any spills during baking.
- Bake the Pie:
- Bake the pie at 400°F (200°C) for 30 minutes, then reduce the oven temperature to 375°F (190°C) and continue baking for an additional 30–35 minutes.
- Monitor the Pie:
- The filling should set and develop a golden crust on top. If the edges of the crust brown too quickly, cover them with aluminum foil.
- Cool the Pie:
- Remove the pie from the oven and let it cool to room temperature. The filling will firm up as it cools.
- Serve and Enjoy:
- Slice the pie and serve it on its own or with a dollop of whipped cream for an extra treat.
By carefully following these steps, you’ll achieve a perfectly baked Water Pie that’s both nostalgic and delicious!
Nutritional Information
Understanding the nutritional aspects of Water Pie can help you enjoy this dessert responsibly while considering your dietary needs. Below is a breakdown of the caloric content and dietary considerations.
Caloric Content
- Calories Per Slice: Approximately 250–300 calories (based on 8 servings per pie).
- The exact calorie count may vary depending on the specific ingredients and serving size. For instance:
- Pie Crust: Contributes around 120–150 calories per slice.
- Sugar: Adds approximately 80–100 calories per serving.
- Butter: Contributes around 50–60 calories per serving.
- The exact calorie count may vary depending on the specific ingredients and serving size. For instance:
Dietary Considerations
- Vegetarian-Friendly: The traditional recipe is suitable for vegetarians.
- Dairy-Free Option: Substitute butter with plant-based alternatives to make the pie dairy-free.
- Gluten-Free Adaptation: Use a gluten-free pie crust and flour for a gluten-free version.
- Low-Calorie Version: Replace sugar with a low-calorie sweetener and use a light butter alternative to reduce overall calories.
- Sugar-Free Option: Use sugar substitutes like stevia or erythritol for a diabetic-friendly version.
Tips for Perfect Water Pie Every Time
Even though Water Pie is simple to make, a few tips can help ensure success and elevate your baking experience.
Common Baking Mistakes to Avoid
- Not Mixing Ingredients Properly:
- Ensure the sugar and flour are well combined before adding water to prevent clumps in the filling.
- Overfilling the Pie Crust:
- Avoid pouring too much filling into the crust to prevent spills during baking.
- Skipping the Baking Sheet:
- Always place the pie dish on a baking sheet to catch any drips or spills and protect your oven.
- Baking at Incorrect Temperatures:
- Start at the recommended high temperature (400°F) to set the crust, then lower the heat to 375°F for a smooth filling.
- Removing the Pie Too Early:
- Allow the pie to cool fully before slicing; the filling firms up as it cools.
- Ignoring Crust Edges:
- Use foil or a pie shield to prevent the crust edges from burning while the filling bakes.
Expert Tips from Professional Bakers
- Chill the Pie Crust:
- Pre-chilling the crust helps it maintain its shape and prevents shrinking during baking.
- Enhance the Flavor:
- Add a pinch of salt to the filling mixture to balance sweetness and deepen the flavor profile.
- Customize the Filling:
- For extra richness, replace part of the water with milk, cream, or coconut milk.
- Use Fresh Ingredients:
- High-quality butter and fresh vanilla extract make a noticeable difference in the pie’s taste.
- Experiment with Spices:
- Adding cinnamon, nutmeg, or cardamom can create a comforting, aromatic twist on the traditional recipe.
- Cool Gradually:
- Allow the pie to cool in the oven with the door slightly ajar to prevent cracking from rapid temperature changes.
With these tips, you’ll be able to troubleshoot common issues and refine your Water Pie for a perfectly baked, delicious dessert every time!
DIY Decoration Ideas for Water Pie
While Water Pie is known for its simplicity, adding decorative touches can elevate its appearance, making it perfect for special occasions. Here are some ideas for simple decorating techniques and creative presentation.
Simple Decorating Techniques
- Powdered Sugar Dusting:
- Use a fine sieve to lightly dust powdered sugar over the cooled pie for an elegant finish.
- Butter Pattern:
- Before baking, arrange small butter slices in a decorative pattern on top of the filling for a visually appealing, golden-brown finish.
- Spice Sprinkle:
- Sprinkle ground cinnamon, nutmeg, or cocoa powder in a pattern using stencils to create unique designs.
- Whipped Cream Topping:
- Add a border of whipped cream around the edge or dollops on individual slices for a creamy and decorative touch.
- Pie Crust Cutouts:
- Use leftover pie crust to create shapes (stars, leaves, or hearts) with cookie cutters. Bake them separately and place them on the pie before serving.
Creative Presentation Ideas
- Rustic Style:
- Serve the pie on a wooden platter or in a cast-iron pie dish to emphasize its traditional roots.
- Individual Servings:
- Bake the pie in small ramekins or tart tins for a modern, personalized presentation.
- Layered Fruit Garnish:
- Add thin slices of fresh fruit (like strawberries, apples, or pears) around the pie’s edge for a pop of color.
- Edible Flowers:
- Garnish the pie with edible flowers, such as pansies or violets, for a vibrant and sophisticated look.
- Drizzle Design:
- Drizzle caramel or chocolate sauce in a zigzag pattern over the pie for a decadent finish.
How to Store and Reheat Water Pie
Proper storage and reheating techniques help preserve the flavor and texture of your Water Pie, ensuring it remains delicious even after a few days.
Storage Guidelines
- Room Temperature:
- If serving within 1–2 hours, cover the pie with a clean kitchen towel or plastic wrap to keep it fresh.
- Refrigeration:
- For longer storage, wrap the pie tightly with plastic wrap or place it in an airtight container. Store in the refrigerator for up to 3–4 days.
- Freezing:
- To freeze the pie, wrap it securely with plastic wrap and aluminum foil. Store in the freezer for up to 2 months. Thaw in the refrigerator overnight before reheating.
Reheating Tips Without Losing Flavor
- Oven Method:
- Preheat the oven to 350°F (175°C). Cover the pie loosely with aluminum foil to prevent the crust from over-browning. Heat for 10–15 minutes until warmed through.
- Microwave Method:
- For individual slices, place a slice on a microwave-safe plate. Heat on medium power for 30–45 seconds, checking frequently to avoid overheating.
- Serve at Room Temperature:
- Water Pie can be enjoyed at room temperature. Simply remove it from the fridge about 30 minutes before serving.
- Avoid Overheating:
- Excessive heat can dry out the filling or soften the crust too much, so reheat gently to preserve its creamy texture.
By following these storage and reheating tips, your Water Pie will retain its delightful flavor and texture, making it just as enjoyable as the day it was baked!
FAQ – Everything You Need to Know About Water Pie
Can I make Water Pie gluten-free?
Yes, Water Pie can be made gluten-free by using the following substitutions:
Flour: Replace all-purpose flour with a gluten-free flour blend or cornstarch for the filling.
Pie Crust: Use a pre-made gluten-free pie crust or make one from scratch using gluten-free ingredients.
These adjustments will ensure the pie is both gluten-free and
Is Water Pie suitable for vegans?
Yes, Water Pie can be made vegan with a few simple swaps:
Butter: Substitute with plant-based butter or margarine.
Pie Crust: Use a vegan-friendly pie crust, which can often be found in stores or made at home using vegan shortening.
These changes maintain
How long does Water Pie last in the fridge?
Water Pie can be stored in the refrigerator for up to 3–4 days:
Wrap the pie tightly in plastic wrap or place it in an airtight container to keep it fresh.
Always allow the pie to cool to room temperature before refrigerating to prevent condensation.
Can Water Pie be frozen?
Yes, Water Pie can be frozen for longer storage:
How to Freeze: Wrap the pie in plastic wrap, then cover with aluminum foil to prevent freezer burn.
Shelf Life in Freezer: Store for up to 2 months.
Thawing: Transfer the frozen pie to the refrigerator and allow it to thaw overnight before reheating or serving.
Tips for making Water Pie in high-altitude areas
High altitudes can affect the baking process, so keep these tips in mind:
Reduce Sugar: Slightly decrease the sugar amount to prevent over-browning.
Increase Liquid: Add an extra tablespoon of water to the filling to account for quicker evaporation at high altitudes.
Adjust Baking Time: Monitor the pie closely as it may bake faster. Check for doneness 5–10 minutes before the suggested time.
Best practices for achieving a flaky crust
A flaky crust is essential for complementing the soft filling of Water Pie. Here are some tips:
Use Cold Ingredients: Keep the butter and water cold while preparing the crust.
Don’t Overwork the Dough: Handle the dough as little as possible to avoid developing gluten.
Pre-Chill the Dough: Chill the dough in the refrigerator for at least 30 minutes before rolling it out.
Bake with a Hot Oven: Start baking at a high temperature to set the crust, then lower the temperature for the filling to cook.
Conclusion
Water Pie is a heartwarming, budget-friendly dessert that showcases the power of simple ingredients and creativity. Its rich history and easy preparation make it a delightful recipe to try. If you’re looking for more unique dessert ideas, consider baking the Pumpkin Banana Loaf or indulging in the Avocado Brownies. For cookie lovers, the Oatmeal Cranberry Cookies are a perfect seasonal treat. Happy baking!
Crunchy Water Pie with Simple and Cheap Ingredients
Ingredients
- 1 unbaked 9-inch deep-dish pie crust
- 1 1/2 cups water
- 1 cup granulated sugar
- 4 tablespoons all-purpose flour
- 2 teaspoons vanilla extract
- 5 tablespoons unsalted butter cut into 5 pieces
Instructions
- Preheat your oven to 400°F (200°C). Place the unbaked pie crust on a baking sheet.
- Pour the water directly into the pie crust.
- In a small bowl, mix together the sugar and flour until well combined. Evenly sprinkle this mixture over the water in the pie crust. Do not stir.
- Drizzle the vanilla extract over the top of the mixture.
- Place the pieces of butter on top of the filled pie.
- Bake the pie at 400°F (200°C) for 30 minutes. Then, reduce the oven temperature to 375°F (190°C), cover the edges of the crust if they are browning too quickly, and continue baking for an additional 30 minutes.
- Once done, the pie will appear watery. Allow it to cool completely at room temperature; the filling will set as it cools. For best results, refrigerate the cooled pie for several hours or overnight before slicing and serving.

