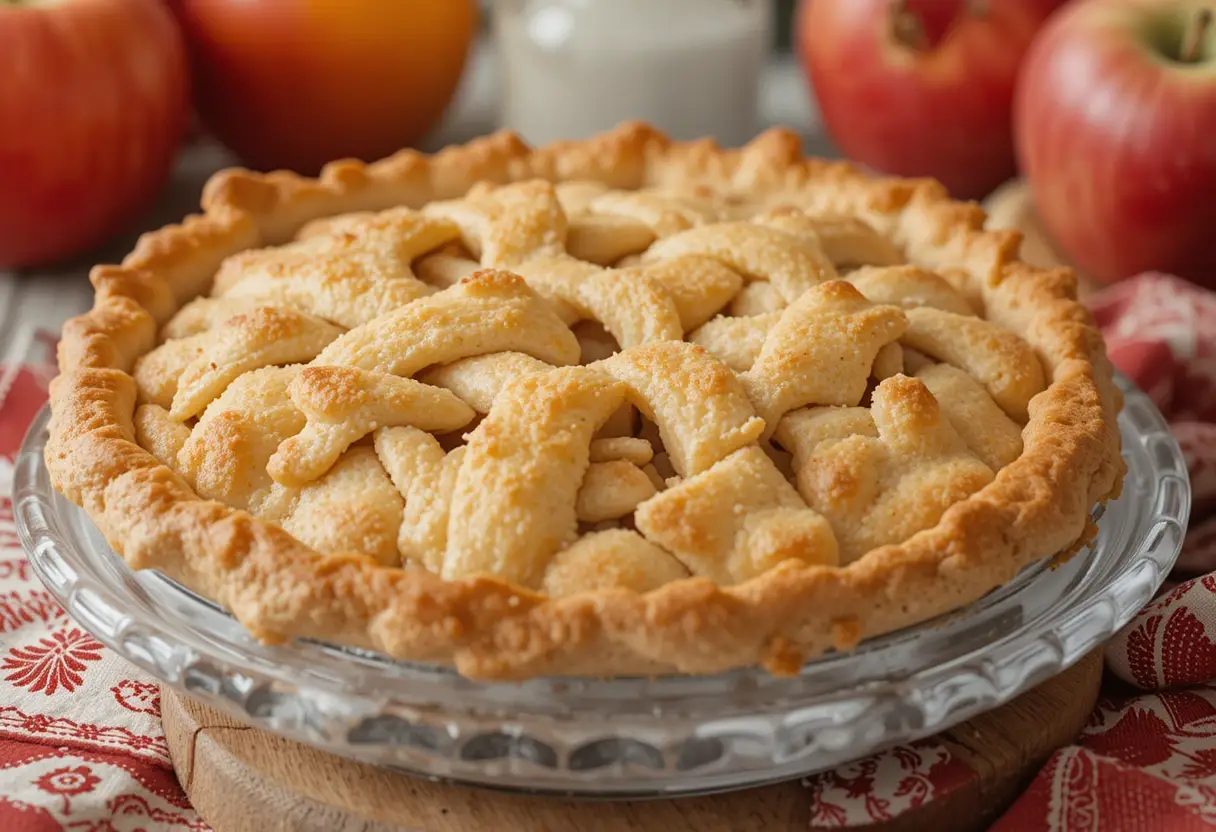
Pillsbury Apple Pie is a classic dessert that combines the timeless appeal of apple pie with the convenience of Pillsbury’s ready-made crusts. Whether you’re hosting a holiday dinner, treating your family to a sweet indulgence, or simply satisfying a personal craving, this recipe makes it effortless to whip up a delightful pie in no time.
Using Pillsbury’s pre-prepared dough saves hours in the kitchen, allowing you to focus on crafting the perfect apple filling and creating a comforting dessert that tastes homemade. With a crisp crust and tender spiced apples, it’s a recipe that’s sure to please any crowd.
Table of Contents
What Makes Pillsbury Apple Pie Special?
What sets the Pillsbury Apple Pie apart is its combination of simplicity and authentic flavor. Pillsbury’s flaky, buttery pie crust serves as the perfect base, eliminating the challenge of preparing dough from scratch. This ensures consistent results every time and allows bakers of all skill levels to achieve a professional-quality pie.
The apple filling, spiced with cinnamon, nutmeg, and a hint of vanilla, elevates the dish into a comforting, aromatic treat. Each slice is a perfect balance of tender fruit and a golden crust, making it a delightful addition to any occasion. Plus, Pillsbury’s trusted quality guarantees satisfaction in every bite.
The Origins of Apple Pie and Pillsbury’s Unique Twist
Apple pie has a rich history dating back centuries, originating in Europe and brought to America by early settlers. Over time, it has become a cultural icon, symbolizing home, tradition, and comfort. Pillsbury takes this classic dessert and makes it accessible to modern bakers by providing a shortcut without sacrificing taste or quality.
Pillsbury’s ready-to-use pie crusts are a game-changer, enabling you to create an apple pie in a fraction of the time it traditionally takes. This innovation allows for more creativity and versatility, encouraging bakers to experiment with different apple varieties, spices, or even toppings like caramel drizzle or crumbly streusel.
By blending a respect for tradition with the convenience of modern baking, Pillsbury Apple Pie is a shining example of how beloved classics can be reinvented to fit today’s lifestyles.
Essential Ingredients for the Perfect Apple Pie
List of Necessary Ingredients
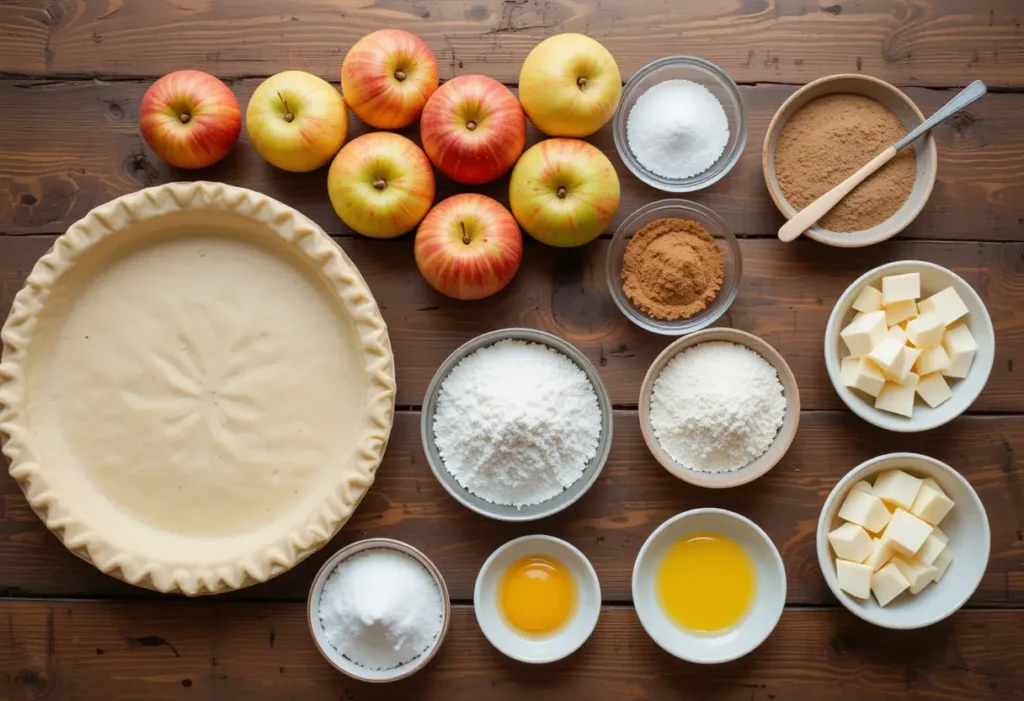
To create a delicious Pillsbury Apple Pie, you’ll need the following ingredients:
- 1 box of Pillsbury refrigerated pie crusts (contains two crusts)
- 6–7 medium apples (peeled, cored, and sliced)
- 3/4 cup granulated sugar
- 1/4 cup light brown sugar
- 2 tablespoons all-purpose flour
- 1 teaspoon ground cinnamon
- 1/4 teaspoon ground nutmeg
- 1/8 teaspoon salt
- 1 tablespoon lemon juice
- 2 tablespoons unsalted butter (cut into small pieces)
- 1 egg (beaten, for egg wash)
- Optional: 1 tablespoon coarse sugar (for sprinkling on top)
Recommended Apples for Best Flavor
Choosing the right apples is essential for achieving the perfect balance of sweetness and tartness in your pie. Here are some of the best apple varieties for baking:
- Granny Smith: Known for their tartness and firm texture, these apples hold up well during baking and add a refreshing tang to the pie.
- Honeycrisp: Sweet, juicy, and slightly tart, Honeycrisp apples enhance the pie’s flavor while maintaining their shape.
- Golden Delicious: A mild, sweet apple that pairs beautifully with warm spices like cinnamon and nutmeg.
- Braeburn: These apples offer a mix of sweet and tart flavors and have a firm texture perfect for pies.
- Jonagold: A blend of Jonathan and Golden Delicious apples, Jonagold combines sweetness with a hint of tartness.
For a more complex flavor, mix different apple varieties to create a balance of sweetness, tartness, and texture.
Tips for Choosing the Right Pillsbury Pie Crust
The Pillsbury refrigerated pie crust is a convenient and reliable choice, but using it effectively ensures your pie turns out perfectly:
- Check the Freshness: Always check the expiration date on the package to ensure your crust is fresh.
- Let It Come to Room Temperature: Before unrolling the crust, let it sit at room temperature for about 15–20 minutes. This prevents cracking and makes it easier to handle.
- Avoid Overstretching: When placing the crust in your pie dish, gently press it into the dish without pulling or stretching to avoid shrinkage during baking.
- Seal the Edges Properly: Use a fork or your fingers to crimp the edges of the crust, ensuring a good seal to prevent the filling from leaking out.
- Enhance the Flavor: Brush the top crust with an egg wash and sprinkle it with coarse sugar for a golden, crisp finish and an added touch of sweetness.
With these ingredients and tips, your Pillsbury Apple Pie will be both visually appealing and irresistibly tasty.
Step-by-Step Guide to Making Pillsbury Apple Pie
Preparing Your Ingredients
- Prepare the Apples:
- Peel, core, and slice 6–7 medium apples into uniform slices, approximately 1/4-inch thick. This ensures even cooking.
- Toss the apple slices with lemon juice to prevent browning and add a touch of tartness.
- Mix the Filling:
- In a large bowl, combine the apples with 3/4 cup granulated sugar, 1/4 cup light brown sugar, 2 tablespoons all-purpose flour, 1 teaspoon ground cinnamon, 1/4 teaspoon ground nutmeg, and 1/8 teaspoon salt. Mix well to evenly coat the apples with the sugar and spices.
- Prepare the Crust:
- Remove the Pillsbury pie crusts from the refrigerator and let them sit at room temperature for 15–20 minutes for easier handling.
Assembling the Pie
- Line the Pie Dish:
- Unroll one Pillsbury pie crust and gently fit it into a 9-inch pie dish. Press it lightly to adhere to the bottom and sides of the dish, taking care not to stretch the dough.
- Fill the Pie:
- Pour the prepared apple filling into the crust, spreading it out evenly. Dot the filling with 2 tablespoons of unsalted butter, cut into small pieces, to enhance the flavor and richness.
- Add the Top Crust:
- Unroll the second Pillsbury pie crust and carefully place it over the filling.
- Trim any excess dough, leaving about 1/2 inch of overhang. Tuck the edges of the top crust under the bottom crust, pressing them together to seal.
- Crimp the edges with your fingers or a fork for a decorative finish.
- Vent the Top Crust:
- Use a sharp knife to cut small slits in the top crust to allow steam to escape during baking.
- Apply Egg Wash:
- Brush the top crust with a beaten egg for a golden finish. Sprinkle with coarse sugar if desired for added texture and sweetness.
Baking Instructions for Optimal Results
- Preheat the Oven:
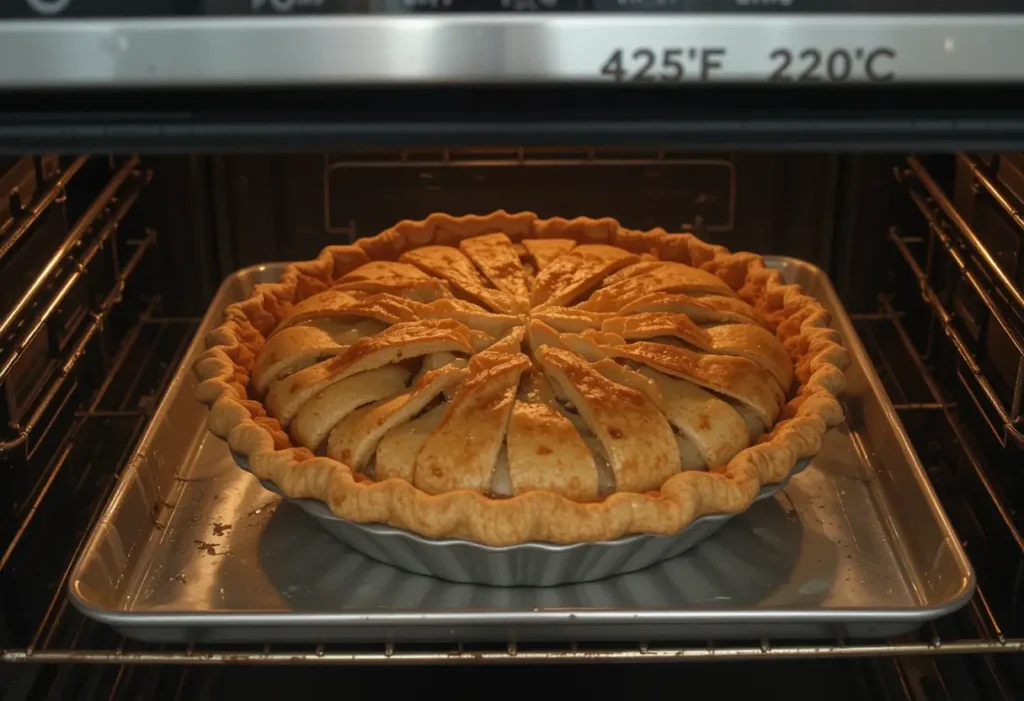
- Preheat your oven to 425°F (220°C).
- Bake the Pie:
- Place the assembled pie on a baking sheet to catch any drips.
- Bake at 425°F for 20–25 minutes until the crust starts to turn golden.
- Reduce the Heat:
- Lower the oven temperature to 375°F (190°C) and continue baking for an additional 30–35 minutes. The pie is done when the crust is deep golden brown and the filling is bubbly.
- Cool the Pie:
- Remove the pie from the oven and let it cool on a wire rack for at least 2 hours. This allows the filling to set and makes slicing easier.
By following this step-by-step guide, you’ll create a perfectly golden, flavorful Pillsbury Apple Pie that’s ready to impress!
Common Mistakes to Avoid When Making Apple Pie
Overworking the Dough
Avoid Stretching the Dough
Stretching the pie crust to fit the dish can cause it to shrink during baking. Instead, gently press the dough into place to maintain its shape.
Handle the Dough Sparingly
Overhandling the crust can make it tough. Let it rest at room temperature for 15–20 minutes before unrolling to minimize cracks and tears.
Keep the Dough Cool
If the dough becomes too warm while handling, refrigerate it for a few minutes before continuing. Warm dough can be difficult to manage and may lose its flaky texture during baking.
For another great baking idea, check out Pumpkin Banana Loaf: A Fall Flavor Favorite.
Preventing a Soggy Bottom
Pre-Bake (Blind Bake) If Necessary
For an extra-crisp bottom crust, pre-bake the bottom crust for a few minutes before adding the filling. Use pie weights or beans to prevent it from puffing up.
Use the Right Apples
Avoid overly juicy apples like Red Delicious, which can release too much liquid. Stick to firmer varieties like Granny Smith or Honeycrisp. If you love fruity desserts, you might also enjoy this Peach Crumble Recipe.
Add a Barrier
Sprinkle a thin layer of breadcrumbs, ground nuts, or a dusting of flour on the bottom crust before adding the filling. This absorbs excess moisture and keeps the crust crisp.
Bake on a Lower Rack
Placing the pie on the lower oven rack helps ensure the bottom crust cooks thoroughly.
Balancing Sweetness and Tartness
Choose the Right Apples
A blend of sweet and tart apples creates a more complex flavor profile. For instance, mix tart Granny Smith apples with sweeter varieties like Honeycrisp or Golden Delicious.
Adjust the Sugar
If your apples are particularly sweet, reduce the amount of granulated sugar in the filling. Taste your apples beforehand and adjust accordingly.
Incorporate Lemon Juice
Adding a splash of lemon juice to the filling enhances the tartness and brightens the overall flavor, preventing the pie from becoming overly sweet.
Don’t Skip Spices
A well-balanced pie also depends on spices like cinnamon and nutmeg. These flavors complement the sweetness and tartness of the apples while adding warmth.
For more delicious homemade treats, try Oatmeal Cranberry Cookies, a perfect companion for a slice of pie.
How to Serve and Store Apple Pie
Best Practices for Serving Apple Pie
Allow the Pie to Cool
Let the pie cool for at least 2 hours after baking. This helps the filling set, making it easier to slice cleanly.
Serve at the Right Temperature
Apple pie can be served warm, at room temperature, or chilled depending on personal preference. A warm slice pairs wonderfully with a scoop of vanilla ice cream or a dollop of whipped cream.
Use a Sharp Knife
Use a serrated knife to cut the pie without crumbling the crust. Wipe the knife clean between slices for the neatest presentation.
Pair with Complementary Beverages
Enhance the experience by serving the pie with coffee, spiced tea, or a chilled glass of apple cider. For another warm and cozy dish, check out this Old-Fashioned Vegetable Beef Soup.
Storage Tips for Keeping Pie Fresh
Short-Term Storage
If you plan to eat the pie within 2 days, cover it loosely with aluminum foil or plastic wrap and store it at room temperature. Keep it in a cool, dry place.
Refrigerate for Longer Storage
For storage beyond 2 days, place the pie in the refrigerator. Wrap it tightly in plastic wrap or aluminum foil to keep it fresh. It will last for up to 4–5 days in the fridge.
Freezing for Extended Storage
To freeze apple pie, allow it to cool completely. Wrap it securely in plastic wrap, followed by aluminum foil, or place it in an airtight freezer bag. Frozen apple pie can be stored for up to 3 months.
Label and Date
Always label the pie with the date before freezing to ensure you use it within the recommended timeframe.
For more storage-friendly baking ideas, try Coconut Bread Recipe, which also freezes well.
Reheating Techniques to Preserve Crust Texture
Reheating in the Oven (Best Method)
- Preheat the oven to 350°F (175°C).
- Place the pie on a baking sheet and cover the edges with aluminum foil to prevent over-browning.
- Heat for 15–20 minutes for a whole pie, or 8–10 minutes for a slice. This method keeps the crust crisp and flaky.
Reheating in a Toaster Oven
For a quick option, use a toaster oven. Heat individual slices at 350°F (175°C) for 5–7 minutes.
Avoid the Microwave
While convenient, microwaving can make the crust soggy. If you must use a microwave, heat slices on a microwave-safe plate in 15–20 second intervals and be prepared for less crisp results.
Reheat from Frozen
If reheating a frozen pie, thaw it in the refrigerator overnight. Then follow the oven reheating instructions above.
For more expert baking tips, check out Mastering the Art of Baking Brioche to improve your dough-handling skills.
FAQs About Making Pillsbury Apple Pie
Can I Use Frozen Apples for My Pie?
Yes, you can use frozen apples to make your pie, but there are some important considerations:
- Thaw the Apples First:
- Allow frozen apples to thaw completely before using them in your pie. This helps prevent excess liquid from making the filling too watery.
- Drain Excess Liquid:
- After thawing, drain off any accumulated liquid. You can pat the apples dry with paper towels to further reduce moisture.
- Adjust Cooking Time:
- Frozen apples may be softer than fresh apples, so they might cook more quickly. Keep an eye on your pie as it bakes to avoid overcooking the filling.
- Flavor Check:
- Frozen apples can sometimes lose a bit of their flavor during freezing. Add a touch more cinnamon or nutmeg to enhance the taste.
How Do I Prevent My Pie Crust from Shrinking?
Shrinkage is a common problem, but these tips can help:
- Don’t Stretch the Dough:
- Avoid pulling or stretching the pie crust to fit the dish. Gently press it into place without altering its natural shape.
- Use Cold Ingredients:
- Keep the pie crust as cold as possible before baking. Warm dough is more likely to shrink.
- Chill Before Baking:
- After assembling your pie, place it in the refrigerator for 20–30 minutes before baking. This helps the dough firm up and prevents shrinkage in the oven.
- Weigh Down the Crust:
- If pre-baking (blind baking) the crust, use pie weights or dried beans to hold the dough in place and keep it from shrinking.
- Avoid Overworking the Dough:
- Excess handling can activate gluten in the dough, making it elastic and prone to shrinking. Handle it gently and minimally.
What Are Some Gluten-Free Alternatives for the Pie Crust?
For those with gluten sensitivities, several options are available:
- Gluten-Free Store-Bought Crusts:
- Many brands offer ready-made gluten-free pie crusts that are as convenient as Pillsbury’s regular crusts. Look for these in the freezer or refrigerated sections of your grocery store.
- Homemade Gluten-Free Crust:
- Make your own crust using a gluten-free flour blend. Mix it with butter or shortening, a pinch of salt, and cold water to form a dough.
- Alternative Flours:
- Use almond flour, coconut flour, or oat flour as a base for a crust. These flours provide unique flavors and textures, but they may require additional binding agents like xanthan gum or egg.
- Crustless Apple Pie:
- Skip the crust entirely and make a crustless apple pie. Simply bake the spiced apple filling in a pie dish and top with streusel or nuts for a gluten-free dessert.
By addressing these common concerns, you’ll be well-equipped to create a flawless Pillsbury Apple Pie, regardless of the ingredients or techniques you choose!
Conclusion
To conclude, Pillsbury Apple Pie is the perfect dessert for both seasoned bakers and beginners. Its simplicity, combined with timeless flavors, ensures a delightful experience for anyone craving a classic apple pie. By avoiding common mistakes, serving it creatively, and storing it properly, you can enjoy this treat at its best.
If you’re looking for more baking inspiration, be sure to explore some related recipes. For example the Water Pie Baking Guide. For seasonal treats, the Pumpkin Banana Loaf is a must-try during the fall months.
With these resources and your perfected Pillsbury Apple Pie, your kitchen will become a hub of deliciousness and warmth.
Homemade Pillsbury Apple Pie With Simple Ingredients
Ingredients
- 1 box 14.1 oz refrigerated Pillsbury™ Pie Crusts (2 Count), softened as directed on box
- 6 medium-sized apples about 2 pounds, peeled, cored, and thinly sliced
- 3/4 cup granulated sugar
- 2 tablespoons all-purpose flour
- 3/4 teaspoon ground cinnamon
- 1/4 teaspoon salt
- 1/8 teaspoon ground nutmeg
- 1 tablespoon lemon juice
Instructions
- Preheat oven to 425°F (220°C). Place one pie crust into a 9-inch glass pie plate, pressing it firmly against the sides and bottom.
- In a large bowl, combine the sliced apples, granulated sugar, flour, cinnamon, salt, nutmeg, and lemon juice. Toss gently to coat the apples evenly.
- Pour the apple mixture into the crust-lined pie plate, mounding it slightly in the center.
- Place the second crust over the apple filling. Fold and tuck the excess top crust under the edge of the bottom crust, pressing them together to seal. Flute the edges as desired.
- Cut several small slits in the top crust to allow steam to escape during baking.
- Bake the pie for 40 to 45 minutes, or until the crust is golden brown and the apples are tender. To prevent excessive browning, cover the edge of the crust with 2- to 3-inch-wide strips of foil after the first 15 to 20 minutes of baking.
- Once done, remove the pie from the oven and place it on a cooling rack. Allow it to cool for at least 2 hours before serving to let the filling set properly.
Notes
- Flakier Crust – Chill the dough before rolling and brush with egg wash for a golden finish.
- Better Filling – Pre-cook apples for 5-7 minutes to prevent a soggy crust.
- Richer Flavor – Mix tart (Granny Smith) and sweet (Honeycrisp) apples for balance.


